
So you started a business and are on you’re merry way, going through the day-to-day until you start to realize your cash is dipping and begin to panic. You say to yourself, “Shit, I am not a “business” person.” Questions begin to swarm: Am I going to survive? When will I run out of cash? What can I do to make it; to survive? These are the common questions new business owners begin to ask. And, even with the prompt changes due to COVID-19, longtime business owners began to ask the same types of questions. Everyone took a step back, they got back to the basics…the foundation that all businesses are based on. Let our Cash flow planner help you answer these questions.
Getting Started
Open up the Cash Flow Planner (Click HERE) and let’s get started! Once the file is open you will notice the tabs, go to the Getting started tab. This will layout the instructions for you on how to ensure the file works as intended. Let’s take a deeper dive!
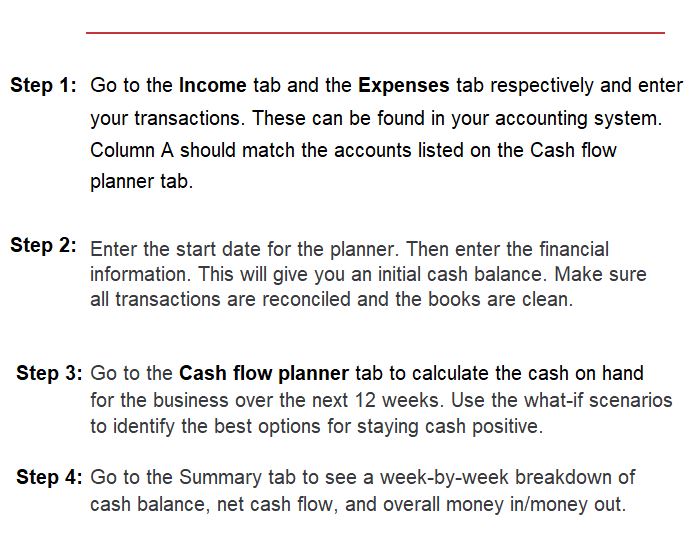
Step 1a – Go to the Income tab. You can gather your income information from your accounting system (see Data section), if you do not yet have an accounting system, give this section your best estimate.
Step 1b – Go to the Expenses tab. You will follow the same process as Step 1a. There is also an option within Column D to add in the Vendor name if you so chose but is not required.
Step 2 – Head back over to the Getting started tab. Enter the start date for the planner – if you choose to get started right away, choose TODAY! Next it’s time to check out your bank balance and enter it here. You will want to ensure you are looking at the same date as the planner. If not everything has cleared the bank yet, you can enter it within the next rows, Outstanding checks and Undeposited funds, respectively. You have just established your Cash balance, great work!
Warning: You will want to ensure that the Account listed (Column A) within the Income and Expense tab matches the name that you will have on the Cash flow planner tab. Since this is formula driven, that is how it picks up the data – by the Account name.
Data
Alright so where does the Data even come from for the Income and Expenses tab?! If you are using QuickBooks you can quickly run a report for the data needed. Within QuickBooks navigate to the Reports section. Choose the report, Transaction Detail by Account.
Cash Flow Planner
Step 3 – Go to the Cash flow planner tab. This is the meat of the process and where you can really start making some decisions for the next 12 weeks of your business. You will notice first, that it will show you just how many weeks you have until zero based on the data that you have entered. Remember that the accounts listed in Column C here should match the accounts listed on the Income and Expenses tabs – if they do not, the correct values will not pull through.
The Cash flow planner tab is broken out into two sections: MONEY IN and MONEY OUT. You will notice within these two sections that you have some What-If Scenario options, these items are not data-driven and instead you can enter whatever you want here. “What-if I get a loan, “What-if I borrow money from family,” “What-if my payroll cost increases.” Using the What-if scenarios will help you understand how making these changes will impact your cash flow.
Summary
The Summary tab gives you a graphical image of what your cash is doing from week to week. Each graph highlights something different for you: cash balance, net cash flow, and overall money in/money out.